Friday, February 15, 2013

(Making Your Own) iBooks in Education

The last post was an introduction to all the apps on my iPad at the moment, but after posting I thought of two things. First, quality, not quantity. I need to cut to the chase and explain my favorite, end of story. Second, finding the right app is difficult and the iTunes Store can sometimes be a little tricky. To help I just decided to take a snapshot of the app list on my finder. Hopefully the names will be easier for you to read and locate the apps on your own. 

Okay, then... drum roll... my favorite app is...
Book Creator by Red Jumper Studio


This app is one that truly redefines the way iPads are used in the classroom. I am referencing the SAMR Model, of course, in which an educator progresses from simply using one tool in place of another (substitution), to enhancing the lesson or strategies in which they teach (augmentation). Then a transformation takes place and a teacher truly modifies the lesson itself. The final step is creating something or doing an activity that was never before envisioned (redefinition). 

Beginning with a simple interface in which the user chooses a layout from three choices, this app then eases users into a self explanatory iBook builder. Watch this video and try it out for yourself. 


Wednesday, February 13, 2013

MrB's Apps!

I have been asked numerous times lately for a list of apps, so here is a screen shot gallery of items in folders I organized on my iPad... at least the current configuration on the most used device:

Image with Category:     

I love Chicktionary, and yes, it is educational! 

Elements is a must for Pysical & Chemistry. Wolfram Alfa will knock the socks off of any secondary science teacher! 

Ask my Granny, Stack the States is Top 10!! 

If you have never used SketchBook, try it now! 

If you want to learn another language or two, Duolingo is for you. Inupiat is one I want to recreate in Yup'ik, and Word Lens is stunning!!

My district is adopting Wonders, and these apps are just a drop in the bucket for what is offered by McGraw Hill. 

These are the teacher-facing apps...

Top Picks for Math = Math Ninja, Motion Math, Math Bingo, and Math Bumpies.

If you haven't seen what LYSD is doing on iTunesU, you are missing out. Download the app and click here.

I used to use Bump a lot, but I think everything is integrated well with email, dropbox, or drive now. Must have for literacy is iTalk. Must have. 

More science... what can I say, I love science. 

I love all of the apps shown here, but I am more excited about creating my own now. If you have never heard of QBooks start with WeAreAlaska and read the introduction. 

I keep all of my iPad apps seldom used here, no big deal... get a flashlight app is you are afraid of the dark. 

Our Choice is an exaple of the future of textbooks, even if you don't like the content... otherwise download my books from iTunesU.

Gotta have my Chrome. Enough said. 

One of my latest favorite apps is SMULE's AutoRap; just say anything and it will autotune and set it to a beat. If you like downloading videos you watch online, try out VDownlaoder

I gave up Skype on iPad for the most part in favor of Google+ because I can conference in other speakers and stream the whole meeting to YouTube!

If you just have to, Skype me, but I think FaceTime is a little beter. If you have a bridge or codec, check out RealPresence. 

PC Control is old-school iPod/iPhone, but I still use it a lot. Personal favorite is SplashTop. 

Spend the money... 

Storage is a must and I have several accounts in each dropbox and drive. (Not sure how MMA got in there)

Living in Alaska or the PacNW? You should get the Alaska Airlines app. You can check in, check flight status, and keep track of rewards.

Well that's about it, except for a minor discussion of docks. I can't tell you how many times people have said, "wow, you can change that?" when I alter their dock. I caution you to put those apps you truly use the most, not the ones you think you use or are the most proud of. It's all about utility! 


Thursday, December 20, 2012

iTunesU: K-12

I remember the first time I signed into iTunes. I was on an HP in Togiak, AK thinking to myself, "What is this Apple stuff?" I was a PC user my entire life and recently bought an iPod 1st Gen with who knows how much storage (500 songs??). I wasn't happy about using iTunes mainly because all of my music was from LimeWire or Napster or whatever it was back in 2005...

Soon I realized, first with an Apple computer for work, then with an Apple music player, that Apple was not just an overpriced computer company, they were a movement. I know, I know, I sound like a cult member, but it was true. Since that login to iTunes that fateful day I have become more and more saturated by Apple products in my every day life. I now have an iPad, shuffle, and MacBook Pro in addition to the Apple TVs, iPads, iPods, laptops, and desktops  I use at work on a daily basis. I have had my qualms over the years about how locked down iTunes is and how rigid some of their policies are, but overall I find it beneficial as it maintains the highest standards in product and application development. You may be wondering why I didn't mention an iPhone... I prefer the Galaxy SII, and am looking at getting the SIII. Proof I still have an open mind!


Diving in headfirst to the Apple KoolAid is tough, but let me tell you why I do what I do. I'll use iTunesU as an example. If one were so inclined, one could search the iTunes Store for iTunesU courses. These courses may be hosted by Harvard, Yale, or even Lower Yukon School District. You can find lecture series' about everything from Constitutional Law to Yup'ik language. All for free!!

If you were to subscribe to these courses, from an iOS device, for example, you could then download books, apps, audio, and video from these sources; essentially auditing the course at no cost. If you would like to try it out open your iTunes from an iPad or computer and search the Store for LYSD. Once you find it in iTunesU, subscribe to the Yup'ik Level One Collection. These sounds will teach you about 100 site words in Yup'ik! Try it out... Let me know what I can do to make it easier, more effective, or more educationally relavent.


Click Here for the LYSD iTunesU account.

Be sure to subscribe and don't forget about LYSD's other offerings online:
Facebook
YouTube
Google+

Monday, December 3, 2012

Literacy Cart Prototype

Here in Mountain Village we have been abuzz over a concept recently brought to life with a little ingenuity and a lot of help from colleagues. This is the first of it's kind (that I know of that is). It is a mobile, battery backed-up, cable managed, all-in-one "classroom." Combined with twenty iPads, and (eventually) a charging station for syncing, this is a brilliant tool for infusing technology in the classroom. I am hoping to improve student learning outcomes in the area of literacy, fluency, comprehension, and mathematics at the third grade level.

Step One: Mobilizing the Unit

This is a fun one. Nothing bothers me more then mobile SMART Boards. The idea of a rolling teaching tool from class to class sounds great, but in reality it is a terrible idea. Without going into too much detail, I managed to procure a cart formerly mounted to a SMART Board and fabricated a TV wall mount to the trunk of the unit. With the assistance of a friend (supervisor), we measured, drilled, and secured the mount.  

Step Two: Mounting the Interactive Display

Assuring that the display will be secure in its current state, we moved on to the planning of component placement and cable management. 

Because the display is fully interactive, it functions just like a SMART Board with pen or finger.


Step Three: Painting the Base

Sometimes the easiest way to make something look like new is to slap a new coat of paint on it. Painting the entire unit matte black, we had a brand new (looking) stand to work with.


Step Four: Power Supply and Battery Back-up

Securing a battery and surge protection unit with velcro strips, the concave shape of the stand lent itself perfectly to the repurposing.


Step Five: Placement of Computing Components

Because the display is a SMART Board, there was a need for a computer with which to control the cart. Deciding on a Mac Mini, we mounted the CPU and external DVD drive using industrial velcro patches.

Step Six: Placement of Apple TV

Being deployed with a class set of iPads, this display point was in need of some means of sharing screens from iPads. With solutions such as Reflection (see previous blog posts) this can be done, but with limits. The Apple TV was chosen to assist in this endeavor. 

Step Seven: Cable& Control Management

As with any project, organization is a key to ensuring safety and success. In this case we employed the use of velcro once again on the Apple and display controllers. All wiring was wrapped, secured, and hidden when possible. The bulk of the wiring was then kept hidden behind the panel covering the hollow frame of the stand itself.


Step Eight: Audio

This particular model of SMART Board (6052i) is a commercial grade display with a built in amplifier. This made our job easy because we could then mix multiple audio inputs with the amplifier and output through standard home speaker systems. The speakers chosen were Panasonic brand, but any would do. These speakers were affixed to the sides of the display once again with velcro. 


Using the device

The device can be used in a variety of ways. The first, and simplest, way is through the Apple TV. When the display and Apple TV is on any iPad can stream content (video and audio) for the class. 

The second way is to use the display as a SMART Board. This is very handy for instruction, small groups, and student led activities. At this point I must mention my favorite way to use the device which is by running Reflection from the Mini. The result is the ability to annotate over the top of the displayed  iPad!

Besides these two possibilities, the display can support multiple other inputs from DVD players (though unnecessary due to the eternal Super Drive mounted and connected to the Mini), VCRs (not sure why...), or anything else you like. Worse case scenario, the network goes down and you might need to display an iPad via VGA adapter and cord directly to the display. Whatever the case may be, this cart addresses it all. 


Thanks for reading and if you would like further information about this or other ideas don't hesitate to contact Sam Bourgeois. 


sbourgeois@loweryukon.org
www.lysd.org


Thursday, November 29, 2012

Maximize Your Google Search Results

"Google-it!" I say it all the time. It is synonymous with 'search for' or 'look up' on the internet. The tough part isn't typing in a query, though, it's sorting out the millions of results.

Here is a tip for you (really a blast from the past): Put quotation marks around what you are looking for if it is more than one word. This will eliminate all of the pointless and irrelevant results and give you only hits on the words, phrase, or sequence you are looking for. 

If that was too easy or maybe you just want to see what else Google can do for you, try out the following "power-search" features~>

Google Knowledge Graph:

Google Image Search Using an Image:

Google Search By File Type:

And last, but not least, there is Google Scholar! 


Monday, November 5, 2012

Document Cameras & SMART Boards

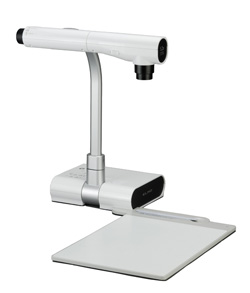
I have been asked to help hook up document cameras many a time in my years as a teacher, tech guy, SMART Certified Trainer, consultant, and now technology coordinator. As is the answer to most questions, I say "Sure it's possible, but what exactly do you want to do with it?"

Let's begin with the hardware. I am currently working in the Lower Yukon School District where most teachers have a MacBookPro, Notebook Software, and a document camera. These cameras are either the Elmo TT-02s or the Avervision 300AF+ models. All of the ideas I share here are also possible on Windows and, of course, other document cameras.

To begin, your camera is a simple device. It has a switch on it to provide users with 1 output while accepting 2 inputs. The design is meant for you to press a button, use your computer on a projector (or SMART Board or monitor), press another button, and display what it in the view of the camera. Simple enough, but I want to use both the computer and the camera at the same time!!


AVerVision

Here is how it's done: Download the Avervision Flash plug in and follow my directions:

Click on the (Mac) version:

You will also need to download the SMART Notebook for Mac html tester below:

file:///Applications/AVerVision%20Flash%20Plug-in/SecuritySettings.html 

Open Notebook and click on the Insert Menu > Flash > Applications > AVerVision Flash Plug-in > ....swf file.


ELMO 


For the Elmo, you will need to download the Image Mate Software for Mac. CLICK HERE.

Once you do, watch this video to see how to view through Notebook: 


Things to remember:
  • Keep the end result in mind, and don't overcomplicate things if you don't need to. 
  • Use the Ink Layer (Notebook 10) or SMART Ink (Notebook 11) any time without the Notebook hassle.
  • Capturing annotations can be done in numerous ways, but I find screen shots to be the simplest (Command+Shift+4 or Command+Shift+3).


Saturday, October 13, 2012

Digital Storytelling


Lately I have been thinking a lot about digital storytelling and what it really means. Here are some definitions found when Googled: 
  • When students create a movie or interactive slide show to tell their story, learning becomes personal.
  • a short form of digital film-making that allows everyday people to share aspects of their life story.
  • the practice of using computer-based tools to tell stories.
  • the modern expression of the ancient art of storytelling.


Basically, I think DS is putting your "voice" into an idea you want shared with others. I could write it down and you would see my emotion, I could record the audio and you wouldn't see my expressions, I could record myself on video, but you couldn't see my visualizations... So what is the best way to tell a story? I don't know. 

What I do know is that there are a ton of recourses out there for story tellers, teachers and students alike. In the coming weeks I will be working with my colleagues to build a story in my personal favorite tool: iMovie. I like iMovie because it easy to use, easy to teach and offers a great deal of flexibility and creativity in the production process. Mainly used for editing movie clips ad jazzing up still images, iMovie can provide a great deal of features if you can just spend the time "playing" in the software. Making movies is only one way to tell a story, though. 

I find that students want to be different in some way when given an individual activity in the classroom  To harness this energy and provide multiple means of interaction with the assessment process or community of learners, I offer the following tools: 

  • Stop Motion Animation
Culture Street
  • Make Your Own Book
Story Cove
  • Jazz Up Text
Prezi

  • Or maybe you just want a special guest reader for a story your students already know! 


For more information about digital storytelling in the classroom:
  • "New Media Pathways to Literacy, Learning, and Creativity"
  • Digital Storytelling in the Classroom - Jason Ohler
  • Web 2.0: new tools, new schools - Solomon and Schrum
  • My Delicious Account